How to change Glue Bucket?
I.Take out the Glue Bucket
Step 1: Heating the PUR Glue
Before attempting to remove the glue bucket, it's crucial to heat the PUR glue within it to an appropriate temperature. The glue needs to be heated around its melting point, which is typically around 180°C. This heating process usually takes about 20 minutes. Heating the glue serves multiple purposes. Firstly, it makes the glue more fluid and easier to handle during the removal and replacement process. When the glue is in a molten state, it can flow more freely, reducing the risk of it clogging or causing difficulties when detaching the bucket. Additionally, heating helps to loosen any residual glue that might have adhered to the inner walls or fittings of the bucket, facilitating a cleaner separation.
It's important to use a reliable heating device or system that can accurately control the temperature. A temperature that is too low might not achieve the desired fluidity of the glue, while a temperature that is too high could potentially damage the glue's chemical properties or even pose a safety hazard, such as causing the glue to overheat and emit harmful fumes or catch fire. Therefore, constant monitoring of the heating process and ensuring the temperature remains within the appropriate range is essential.
Step 2 and Step 3 Operating at the Same Time
Step 2: Add Gas and Lifting Glue Bucket
Simultaneously with the other actions in this stage, the process of adding gas and lifting the glue bucket begins. This step requires a cautious and gradual approach. You should start by jogging the gas addition mechanism, which means adding the gas in short, controlled bursts. The key here is to add gas slowly. Avoid adding gas too much in a short time as this can lead to sudden and excessive pressure changes that could cause the glue bucket to move in an uncontrolled manner or even cause damage to the equipment or pose a risk to the operator.
The purpose of adding gas is to create a gentle upward force that will assist in lifting the glue bucket. As the gas fills the space beneath the bucket or within the relevant lifting mechanism, it gradually lifts the bucket off the floor or its resting position. This lifting process needs to be carefully monitored to ensure that it proceeds smoothly and evenly.
Step 3: After the Tank Leaves the Floor, Stop Lifting Tank and Take Out the Tank
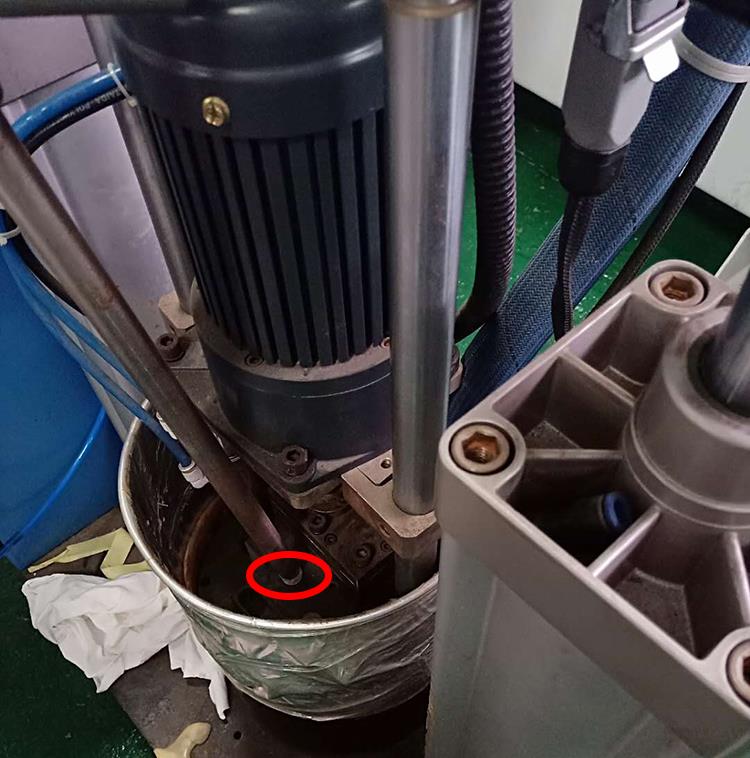
Once the glue bucket has been lifted to a point where it has completely left the floor, it's time to stop adding gas and halt the lifting process. At this stage, you need to be extra careful as the bucket is now suspended and could potentially tip or fall if not handled properly. Use appropriate tools or handling equipment, such as a crane or a hoist with suitable attachments, to securely grip the bucket and carefully guide it out of its position. Make sure that there is enough clearance around the bucket to avoid any collisions with other objects or equipment in the vicinity.
When taking out the tank, it's advisable to have a clear path and a designated area where the removed bucket can be safely placed. This area should be away from any heat sources or areas where it could cause a mess or interfere with ongoing operations. Additionally, check for any remaining glue or debris that might be attached to the outside of the bucket and clean it off if necessary to prevent any spills or contamination in the workspace.
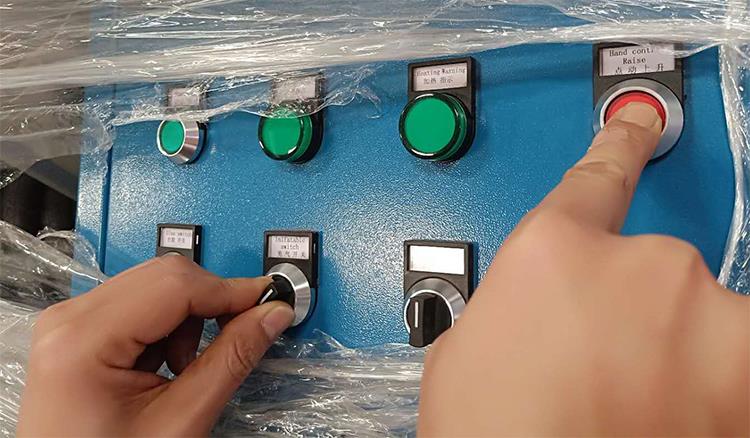
II. Change Glue Bucket
Step 1: Prepare Glue, Open It, and Package the Barrel
The first step in changing the glue bucket involves careful preparation of the new glue. Open the new glue container in a clean and controlled environment. Once opened, it's important to package the barrel properly to prevent any contamination or leakage. Using tin foil to wrap the barrel is a good practice. The tin foil acts as a protective layer, shielding the glue from dust, debris, and any external substances that could potentially mix with it and affect its quality.
To further enhance the sealing, it's recommended to stick tapes around the outside of the barrel. This helps to hold the tin foil in place and provides an additional layer of protection against any accidental openings or exposure to the environment. Another crucial aspect is applying high temperature lubricating oil to the inner wall of the barrel. The lubricating oil should have a high temperature resistance of more than 250°C. This oil serves to facilitate the flow of the glue within the barrel and also helps to prevent the glue from sticking to the walls. When the glue is heated during the subsequent operation, the lubricating oil ensures that it can move smoothly and be dispensed without any hindrance.
It's important to choose a high-quality lubricating oil that is specifically designed for use with high-temperature materials like PUR glue. Inferior or inappropriate oils could react with the glue or break down under the high temperature conditions, leading to unwanted chemical reactions or a reduction in the effectiveness of the lubrication.
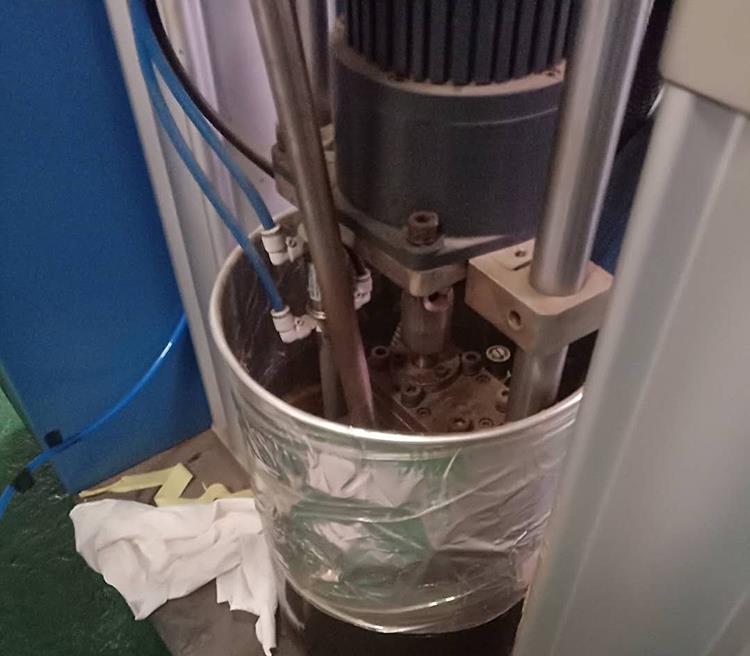
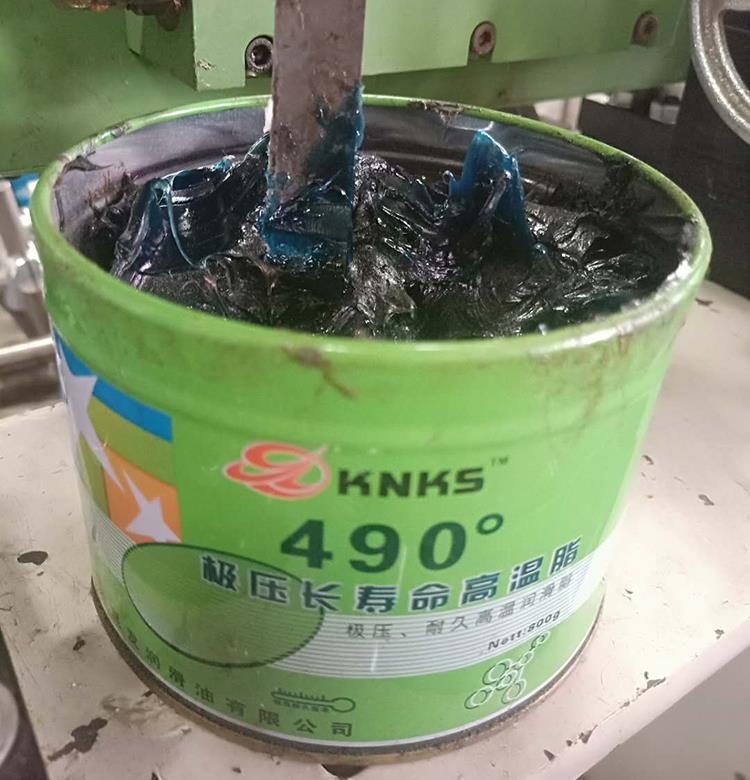
Step 2: Open the White Screw, Release the Gas, and Finish Changing the Glue Tank
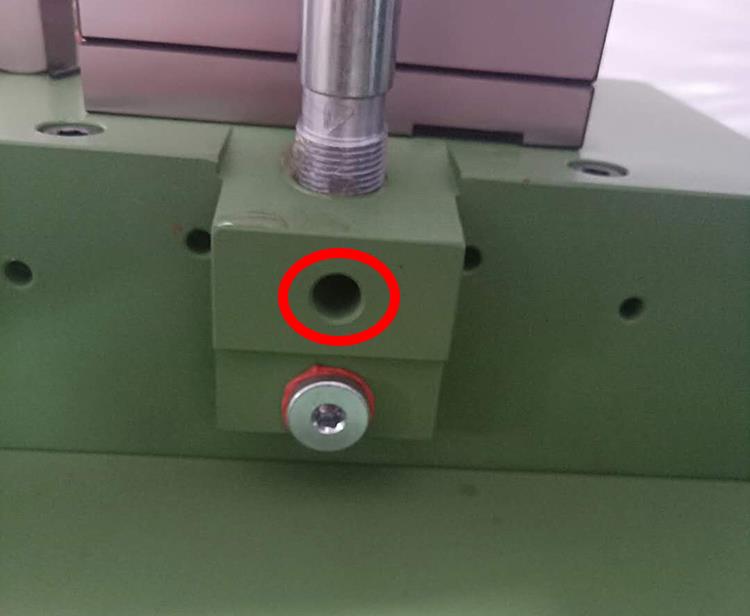
Next, locate the white screw on the new glue bucket or the relevant equipment. Open the white screw slowly to allow the gas within the bucket to escape. As the gas is released, keep a close eye on the glue level and the opening. When the glue liquid starts to flow out from the below hole, it indicates that the internal pressure is being properly adjusted and the glue is ready for use. At this point, quickly close the white screw to prevent any excessive glue leakage or loss of pressure.
Once the white screw is closed, the process of changing the glue tank is considered complete. However, it's still important to double-check all the connections, seals, and the overall setup to ensure that there are no leaks or any other issues that could affect the performance of the glue application process. Make sure that the new glue bucket is properly positioned and secured in place, ready for the next round of glue dispensing or laminating operations.
